Thursday, April 28, 2016

Shrimp, Black Bean & Pineapple Foil Packets

LOVE grilling whenever I possibly can.  With the weather changing, I am looking forward to grilling more.  However, one thing I tend to forget about is foil pack cooking.  In the past, we used to make foil packets of sausage and potatoes (what my husband and his family called Hobo's).  They were always tasty and SUPER easy clean up.  But since incorporating more clean eating recipes into our weekly meal lists, Hobos don't happen very often.

So, when I saw this recipe recently I knew I had to try it.  It was full of ingredients our family enjoys and let me just say the reviews from my 7 year old were fantastic.  He kept saying how good they were and kept asking for more until there was no more left.  I always ask after we try new recipes if I can make them again, and hands down he said YES!!!  PLUS, the super easy clean up made up for the time it took to prep the packets.  Give them a try!  Let me know what you think if you try them.

Shrimp, Black Bean & Pineapple Foil Packets

Ingredients:


12oz. Raw, Medium sized Shrimp (peeled, deveined, tails removed)
1 cp. Black Beans, cooked
3/4cp. Finely Diced Pineapple
1/3cp. Finely Chopped Red Onion
2tbsp. Finely Chopped Jalapeno Pepper (seeded and ribs scraped out)
Ground Ginger
1tbsp. Fresh Lime Juice, divided
1/2 tsp. Ground Corriander
3/4 tsp. Ground Cumin, divided
1/4 tsp. Chili Powder
Pinch Sea Salt
Fresh Ground Black Pepper
Fresh Chopped Cilantro (optional)
1/2 Avocado, diced

Directions:

- Preheat grill to medium.

-  Rinse the peeled, deveined shrimp and pat dry.  Place in a medium bowl and sprinkle 1/4 tsp. cumin, chili powder and salt and pepper over the shrimp.  Toss to coat and set aside.

-  In a medium, bowl - combine the black beans, pineapple, red onion, jalapeno and ground ginger.  Stir in 1/2 tbsp. Lime Juice, corriander and remaining 1/2 tsp. cumin.

-  Spray 2 large pieces of aluminum foil with cooking spray.  Spoon half the black bean mixture into the center of each and top with half of the shrimp.  Squeeze the remaining lime juice over the shrimp.  Bring the edges of the foil up to meet in the center above the shrimp and black bean mixture.  Fold down the foil and seal well.

-  Place the foil packets on the grill, cover and cook for 10-12 minutes until the shrimp are opaque.  (I cooked ours for about 12 minutes.)

-  Carefully open the foil packets - WATCH FOR THE STEAM - and stir the contents.  Top with diced avocado and sprinkle with fresh cilantro if desired.

- ENJOY!!!!  You can serve this over brown rice, tortillas or lettuce wraps.  I served mine with brown rice I prepped a day or so prior.

***Can't wait to try this but use chicken sometime instead of shrimp in the near future.

Let me know what you think!!  Thanks for stopping by and checking out my blog!

~Sarah Strubhar
Independent Team Beachbody Coach

Tuesday, April 12, 2016

Chicken Fajita Pita Pizzas

After making a double batch of the slow cooker chicken fajitas on Friday night, I knew I wanted to try a chicken fajita pizza, I mean why not?!?!  And lately in our house, Saturday night has been pizza night, so that's exactly what I did!  Let's just say, yet again, I was NOT disappointed.  They were DELICIOUS and can't wait to have them for lunch this week as well!

Chicken Fajita Pita Pizzas

Ingredients:
1 Red Container Slow Cooker Chicken Fajita Meat (click here for the recipe)
1/4 Green Container of Cooked Peppers and Onions from the Chicken Fajitas
1 6-inch Whole Wheat Pita Pocket
1 Blue Container of Shredded Cheese (I used Mexican Cheese)
Couple tablespoons of Fresh Salsa

Directions:

-  Pre-heat your oven to 350 degrees.

-  Spread the salsa over the whole wheat pita.

- Top with the chicken. (I used about 1/2 my container and then used the rest on a large salad.)

- Top with cheese, then the peppers and onions.

- Place in pre-heated oven for about 8-10 minutes (or until your cheese is melted and bubbly).

ENJOY!!!

Thanks for stopping by!  Hope you enjoy!!  Feel free to leave some feedback if you try this out and check back often for more new recipes!

~Sarah Strubhar
Independent Beachbody Coach

Slow Cooker Chicken Fajitas

I was looking for some new recipes to try recently and I have seen this one for a while on Team Beachbody's blog site.  It has been on my list to try and I am SOOOO glad I finally gave it a try.  It was easy to prep and do and didn't disappoint.  Not to mention short of the toppings you add if desired, dinner was in one pot and done!  Give it a try for a new "Mexican Monday", "Taco Tuesday" whatever you want to call it recipe!!!

Slow Cooker Chicken Fajitas

Ingredients:
1 (14.5-oz.) can Diced Tomatoes (or diced tomatoes with green chiles), no salt added
1 med, Onion, cut into quarters, sliced
1 med. Red Bell Pepper, cut into strips
1 med. Orange Bell Pepper, cut into strips
2 tsp. Chile Powder
1 tsp. Cumin
½ tsp. Black Pepper
1 1/2 - 2 Tbsp. fresh Lime Juice
1 lb. raw Chicken Breast, boneless, skinless, (sliced if desired)
8 6-inch Whole Wheat Flour Tortillas, warm OR Corn Tortillas
½ cup Fresh Tomato Salsa
8 tsp. low-fat (1%) plain Greek Yogurt
½ medium Avocado, sliced (optional)
Finely chopped cilantro
Taco Toppings if desired - Romaine Lettuce, Tomatoes, Cheese, etc.
Directions:
1. Place tomatoes, onion, bell peppers, chile powder, cumin, pepper, and lime juice in a 3-quart slow cooker; mix well.
2. Add chicken; cook, covered, on low temperature for 4 to 5 hours (or on high or 2 to 3 hours), stirring once or twice, until chicken is cooked through and vegetables are tender.
3. Evenly divide mixture between tortillas. Top evenly with salsa, yogurt, avocado, and cilantro.
Serves:  4, 2 Fajitas each (everything divided evenly among the tortillas)
21 Day Fix approved - I measured mine the following:
Chicken = 1 Red
2 corn tortilas = 1 Yellow
1/4 of a green container of cooked Peppers/Onion = 1/2 Green
Remaining Toppings into Green
Avocado OR Cheese = 1 Blue
Hope you enjoy this as m

uch as my family did!  Can't wait to have this again!  Oh and I will be, as I made a double batch to have enough for snacks, salads and BONUS I made Chicken Fajita Pita Pizzas!!!  Talk about a delicious way to change up the normal pizza night!
Thanks for stopping by!  Feel free to leave your comments once you try this out!
~Sarah Strubhar
Independent Team Beachbody Coach

Wednesday, April 6, 2016

3-Cheese Spaghetti Squash Casserole Bake

Have you ever tried spaghetti squash?  It might sound crazy to you to even try it.  I thought the same thing when I tried it at first.  And, honestly, I DID NOT like it.  The first time I tried it I microwaved it and actually threw it in the trash.  But, since that time over 7 years ago, I have given it another try or two or three or four and have finally come to LIKE it!!!

But, I usually just roast it and serve it with sauce and meatballs.  I have tried different recipes with it and haven't found any I have liked as much - UNTIL NOW!!!!!  Found this recipe in an issue of the Clean Eating Magazine and altered it a little bit.  Let's just say it was SOOOO yummy, I could have eaten the entire dish, thank goodness for my 21 Day Fix container to keep me on track.  Give it a try and let me know what you think!

3-Cheese Spaghetti Squash Casserole

Ingredients:
1 medium Spaghetti Squash, halved lengthwise with seeds removed
2 tsp. Olive Oil, divided
10oz. Mushrooms, sliced
1 medium Yellow Onion, diced
1 large Jalapeno Pepper, seeded and diced
Garlic Powder (or 1 clove garlic, minced)
1-2cp. Spinach leaves (I added this and only added 1cp. of spinach and wished I would have added more)
25 Grape Tomatoes, halved (I added this and would add more next time)
6oz. Pepper Jack Cheese - grated or shredded
2oz. Mozzerella Cheese - grated or shredded
1/2 cp. Whole Milk Ricotta Cheese
1 1/2 tsp. Paprika
1 tsp. Sea Salt
1/2 tsp. Black Pepper
1 tbsp. Whole Wheat Bread Crumbs (optional)

Directions:
1.  Preheat oven to 375 degrees.  Prick the halved and seeded spaghetti squash with a fork all over.  Place in a 9x13 baking dish cut sides down and add 1/2 inch water.  Bake for 1 hour.  Then let cool a bit to be able to touch.

2.  In a large skillet, heat 1 tsp. oil on medium high heat.  Add the mushrooms and saute, stirring frequently for about 5 minutes.  Add in the last 1 tsp. olive oil, onion, jalapeno and garlic clove or garlic powder.  Saute until the onion is translucent (about 5 more minutes).  Then stir in the spinach and tomatoes if desired and cook until the spinach begins to wilt down.  Remove from heat and let cool slightly.

3.  With a fork scrape the insides of the squash into a large bowl.  Add in the mushroom mixture, cheese, paprika, salt, and pepper.  Stir to combine.  Spread in a casserole dish.  Sprinkle with bread crumbs if desired.  Bake for 25 more minutes until bubbly.

*When I ate this, I measured out 1 1/2 containers of this in my green container and counted it as 2 green containers and 1 blue container.  I omitted the bread crumbs as I am not a fan of  bread crumbs on casserole dishes.
*  I also served this with some meatballs on the side for a proteinAND a piece of whole grain garlic bread.

Hope you enjoy this as much as I did!

Feel free to leave some feedback if you try this recipe or any other recipe I have posted.

Thanks for stopping by and check back again for more recipes.

~Sarah Strubhar
Independent Team Beachbody 
Ruby Coach

Tuesday, March 8, 2016

22 Minute Hard Corps Kick Off

I have been so excited about the newest program coming out 22 Minute Hard Corps.  It is just that 22 minutes long - start to finish!!!  Seriously, who doesn't have time to fit in 22 minutes of exercise a day!?!?!

Let me just say, I am on day 2 and am LOVING it!  When I was in my early 20s my husband and I had a discussion of me going to OCS school for the military (well me asking and him adamently saying NO).  

Not to mention, secretly I have always wondered what his PT days were like when he went through boot camp many years ago.  Well, if this is any small indication, no wonder boot camp graduates are super fit upon graduation!

Believe me, if you don't think 22 minutes is enough I encourage you do contact me to try it out!  I just completed 3 months of P90X3 and I am sweating the same if not more in the 22 minutes as I did for the 30 minutes.  

My goal for the next 8 weeks is not only complete the workout as laid out by Tony Horton, but to STICK to the meal plan.  I have always struggled with completing the meal plan side of a program.  I always tend to have WAY to many treats, cheats and extra bites.  So with that said, please help hold me accountable and on track!  Oh yeah and you want to know one of the best things is, this program is designed to work with the containers I ALREADY have from 21 Day Fix - BONUS!  No guessing on portion sizes here!!!

My meal plan is a decrease for me compared to X3, so I have been hungry yesterday and today so far.  I am hoping things will get better as my body adjusts.  Stay posted to see how that goes.  But, to get an idea of my meal plan bracket, here is what I have planned for the week nutrition wise.

Have a great week and if you are interested in learning more, reach out to me or complete my Wufoo application using this link:  https://sarahstrubhar.wufoo.com/forms/m1t99jv41lmfhbc/!

Thanks so much for stopping by and check back often for more info on the program!
~Sarah Strubhar
Independent Team Beachbody
Ruby Coach

Tuesday, February 23, 2016

3 Day Refresh Recap

As many of you may have seen last week I posted about preparing for resetting my body and finally (after many months) completing the 3 Day Refresh.

Were there struggles?  YEP.
Were there benefits?  YEP.
Were there moments of HANGRY?  YEP.
Were there moments of joy?  YEP.

But, I will say it was well worth the struggle, hangry moments to feel better.

Leading up to the Refresh
Prior to completing the refresh, I was on vacation for a week but even prior to that, I really wasn't focused on my eating.  Even though I was doing my meal plans, I would find I would have an extra bite here or there of something.  I had too many glasses of wine.  I ate ice cream.  All in all, my nutrition had just started to slide downhill it seems like since the holidays.

So, when a relative texted me asking if I had ever done the 3 Day Refresh, I said nope, but I would be happy to do it with them, considering I would need it after all the above PLUS vacation.

While on vacation, I tried to stay on track, but it was hard when there weren't many healthy options.  I had burgers, white rolls, french fries a few times.  Some SUPER yummy nachos, dessert and you know how it goes.  Once you start, your body craves those types of food even when you don't normally eat them.

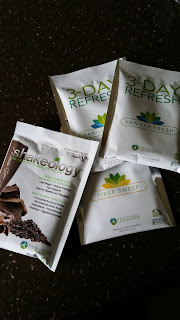
I got home and my Refresh was waiting for me.  I opened the box and was greeted by the drink mixes, Shakeology packets, and nutrition guide.  The guide really was easy to follow, I just had to determine what I wanted when.

The Plan:

Each of the 3 days I would start every morning with a glass of water and then have my Shakeology with a side of fruit within an hour of waking up.  I chose to eat my fruit but you could have mixed it in!

About an hour later I would have a cup of hot green tea.  Then an hour later (mid-morning) I would have the fiber sweep.  I actually didn't mind the fiber sweep at all.  Prior to completing the Refresh, many people said they couldn't stomach the fiber sweep.  But, it reminded me of the lemon Nestea iced tea instant tea mix my mom used to make when I was a kid.
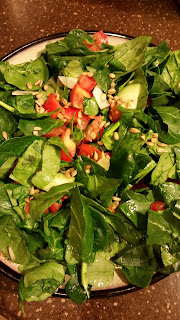
Two hours after the fiber sweep, I would have lunch which consisted of a Vanilla Fresh shake, some fruit, veggies & a healthy fat.  The afternoon then consisted of a snack at least an hour after lunch, then a cup of hot green tea, and then by then it would be dinner time which was another Vanilla Fresh shake and a dinner option.  I will say the Vanilla Fresh shake was the toughest one for me to drink.  I struggled with that one each time I drank it, and was about ready to jump through the roof with excitement after I drank my last one on Day 3.

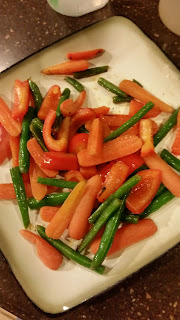
The nutrition guide is fantastic and comes with 9 different meal options for dinner.  I tried the stir fry and spinach salad and really liked both.  I can't wait to do the spinach salad but add some protein on it.

I will say I drank at least a gallon of water every day as the guide recommended and then also added a cup of organic vegetable broth as well.

All in all, I was consuming between 900-1000 calories.  It isn't recommended to restrict your calories to this level daily but for a short period of time it was fine.

During the Refresh
So, at the end of Day 1, I was tired and had a headache for sure.  I would be kidding you if I didn't tell you this.  I was tired, but then again I did a pretty decent workout the morning of Day 1.  It is suggested in the guide to not do an intense workout while doing the refresh.

I learned my lesson on Day 2 and 3.  I still had a headache, but by day 3 it was minimal until I waited to long to eat in the afternoon.  I wasn't tired.  It was also great to get 8+ hours of sleep per night each night. I found by the time I got the kids to bed I wasn't far from being in bed either so I wouldn't be tempted by anything.

Honestly, it was probably a good thing I didn't have too many things going on those 3 days though.  Between my kids coming off the vacation high, and all of us getting back in the swing of things, I wasn't the most pleasant person to be around I am sure.  So, to my kids and anyone I may have encountered those 3 days, I apologize for my hangry mood.

After the Refresh

I will say on Friday morning when I woke up, I felt wonderful.  I was full of energy and was ready to conquer the day.  It felt great to wake up with that feeling as I hadn't felt that way in a while.

Was the hangry worth it?  Yes it was.  That bloated feeling I had finally went away and I can say I felt great.  For me one of the biggest victories from completing the 3 Day Refresh was I was able to know I could say no to certain foods and stay strong.  It helped me re-focus my nutrition and has helped me stay on track without too many slip ups since last week.

In fact, we had an impromptu birthday celebration for one of our neighbors over the weekend, I didn't have a single glass of wine and I didn't keep going back munching on food like I had done the month before.  In fact at one point we were chatting and there was a bowl of chips sitting in front of me on the counter, I put my hand in to get a chip and then pulled it back without taking a chip.  It just wasn't worth it!  I woke up the next morning feeling victorious that I actually made it through the night without wine and too much food.  However, I did have one small piece of cake, but that was it.  In the past I would have gone back for more.

My Results

So, my overall results were I lost 3 inches and 3.6 lbs.  I would definitely do the 3 Day Refresh again to get over the bloat and help me get back on track when I lose focus.  Because let's be honest, as much as we try to stay on track and not have too many treats, we are not perfect and sometimes a little help to reset and re-focus is what is needed.


Thanks for stopping by and all your support.  Have a great day and check back again for future blog posts.

**Also, as a side note, for the relatives that did the refresh with me last week, both lost 4lbs. in 3 days!  Great job!!!!

~Sarah Strubhar
Independent Team Beachbody 
Ruby Coach

Wednesday, February 17, 2016

Enchilladas - Cleaned Up

As you may have seen in the past, we greatly enjoy Tex-Mex/Mexican style dishes.  One I used to make frequently pre-clean eating days was enchilladas.  I used to buy the canned enchillada sauce and follow the directions on the can.  Once we started eating clean, I knew that wasn't going to work anymore.  I mean seriously, the sodium alone used to make me drink like a fish for the entire day after.

So, one day I was searching for "cleaner" versions of enchilladas and came upon this recipe. When I first saw it, I thought wow, there are a ton of ingredients and it is going to take forever to make.  But decided it was worth a shot and let me tell you:

IT WAS ALL WORTH IT!!!!  The ingredients and time it took yes are more than the canned sauce steps, but I will NEVER go back to doing enchilladas any other way.  

Let me put it this way, I have to quickly fill the tortillas before I eat the filling.  The filling IS that GOOD!!!!  Hope you try them out and give them a shot!

Enchilladas

Sauce Ingredients:

1-29oz. can of Tomato Sauce (I use crushed tomatoes or sauce with Low-No Sodium)
5 tbsp. of Olive Oil 
Garlic Powder (or you can use 3 cloves of crushed garlic)
1/4 cp. Fresh Cilantro (no stems)
1/2 Sweet Yellow Onion
1/2 Red Bell Pepper
1/2 can Rotel (with juice)
1/2 tsp. Ground Black Pepper
1/2 tsp. EACH of Chili Powder, Cumin, Paprika* 
Whole Wheat Flour (optional, if needed to add to sauce to thicken)

*You can use all the following Mrs. Dash's seasonings, but I don't have them and didn't want to buy 
them each - Table Blend, Southwest Chipotle, Chili Lime seasonings)

Sauce Directions:

1.  In a blender or food processor, combine all the ingredients for the sauce (except the flour) and puree until smooth.

2.  Once blended smooth, pour the sauce in the pan and cook on low and let simmer for about 15 minutes.


Enchillada Filling Ingredients:

1 lb. package Lean Ground Turkey (could also use super lean ground beef or even ground chicken)
1/2 Sweet Yellow Onion, chopped
1/2 Red Bell Pepper, chopped
1/2 can Rotel, juice drained
1/2 cp. Frozen Sweet Corn
1/2 cp. Black Beans, drained
1/4 cp. Fresh Cilantro (no stems)
1/2 tsp. Ground Black Pepper
1 cp. Cottage Cheese
1/2 tsp. each of Chili Powder, Cumin & Paprika*

*You can use all the following Mrs. Dash's seasonings, but I don't have them and didn't want to buy them each - Table Blend, Southwest Chipotle, Chili Lime seasonings)

Filling Directions:

1.  Preheat oven to 350 degrees.
2.  Start browing the ground meat in a medium pan on the stove and add the chopped pepper and onion cooking until the turkey is browned and the onion and pepper are soft and tender.  Once cooked set aside to cool.

3.  In a seperate large bowl, combine the Rotel, sweet corn, black beans, cilantro, black pepper, cottage cheese and seasonings.  Once the turkey mixture has cooled, add that to the cottage cheese mixture and stir to combine.

4.  Spray a 9x13 baking dish with cooking spray and assemble your tortillas with the filling mixture.  If you are using the 21 Day Fix Containers, I fill each tortilla with 1 red container of meat.  The more filling the better. I would rather fill up on what is inside the tortilla than the tortilla itself.

5.  Place each rolled tortilla in the sprayed casserole dish.  You should be able to fit all 8 in the baking dish.

6.  Once all the tortillas are assembled and in the baking dish, pour all the simmered sauce over them.  DO NOT sprinkle with cheese yet!

7.  Cover with aluminum foil and bake for 30 minutes.  Then remove the foil, sprinkle with the cheese and bake for another 15 minutes until the cheese is melted.

ENJOY!!!

Thanks for stopping by!  Hope you enjoy them as much as we do!  Feel free to come back and leave some feedback once you try them out.

~Sarah Strubhar
Independent Team Beachbody
Ruby Coach

Sunday, February 14, 2016

3 Day Refresh Prep!

You may or may not have heard of a program Beachbody offers called 3 Day Refresh.  It is a 3 day program to reset your body.  It is not a cleanse where you are starving yourself or drinking only juice.  Thank goodness, because I wouldn't be able to do it if so!!!  I HAVE TO EAT!!!!

I am getting ready to do it for the first time this week and looking forward to it.  I fell off the wagon hard last week with vacation.  My water intake was WAY low, my food was hit or miss, my workouts weren't the norm, and boy I am feeling it.

I have an awful bloated feeling going on; I am tired, sluggish and just can't seem to focus the last couple days!  Needless to say, I am excited to get back on track!  

Here is a look at my meal plan for the week.  Check back later this week for a recap of the 3 Day Refresh!

Wednesday, February 3, 2016

Why Drink More Water?

We all hear how important it is to drink more water, but have you ever wondered why it is so important?  I know I always struggled with this and it took me a while to get used to the idea of drinking more water.

BUT, why do I need to drink more water.  There are so many things out there to listen to, but here are some benefits I have that I have found by drinking more water:

BENEFITS TO DRINKING MORE WATER

Reduces Bloating
 - Crazy as it sounds, when we drink enough water, it helps reduce that bloating feeling.  I know, I know I used to think the more I drank the more bloated I would feel, but actually I have found it to be the complete opposite.

I have found this to be true because like most things when our bodies need something and they aren't getting enough of it, our bodies tend to hold on to whatever it is we need.  Therefore when our bodies need more water, it will retain water instead of letting it go resulting in the bloat feeling!  WHO WANTS TO FEEL BLOATED???  - NOT ME!!!!

Suppresses the Appetite
-  Yep, another crazy thing...when our bodies trigger we are hungry, are we really hungry or are we thirsty?  I would venture to say you are likely thirsty and not hungry especially if you just ate recently.  So, next time you feel hungry try drinking some water first and see if that helps...

Helps Your Skin
- When drinking enough water, our skin will stay hydrated and therefore be shiny.  Water affects all the cells of our bodies.  Therefore when are bodies are dehydrated, our skin dries out as well.  I know I used to suffer from REALLY bad dry skin, especially in the winter.  However, since increasing my water intake to where I should be, I no longer have REALLY bad dry skin in the winter.

Helps keep you Regular
-  When you don't drink enough regular there is always a chance of becoming constipated  Crazy as it sounds drinking more will help you feel less constipated and have regular bowel movements - TMI, maybe :).

Fights Fatigue
- Our brains are highly dependent on water.  When we lack water, our brains think we are tired and tends to function on a lower level than if we were properly hydrated.  So, the next time you feel a drop in your energy, go drink some water.

SO, HOW MUCH WATER SHOULD YOU DRINK?

There are so many typical ideas of how much water to drink.  Granted how much you drink depends on many things.  But, my rule of thumb goes back to.....

Ready for it???

HALF YOUR BODY WEIGHT IN WATER!!!!

Yep, you read that right!  Half your weight in water.  So find a water bottle or something easy to help you keep track.  My trick is, I have a water bottle (or 2 or 3) that I know how many ounces each one holds and then I just have to remember how many bottles I have consumed per day and how many more I have left.

Hope these tips have helped and next time you are tired, hungry or feeling bloated, drink up!!!


Thanks for stopping by!

~Sarah Strubhar
Independent Team Beachbody Ruby Coach

Tuesday, January 26, 2016

One Pan Balsamic Chicken

We eat chicken around here more nights than not most of the time and I am always on the hunt for some new recipes.  My husband traveled earlier this month to see family and one of the dinners he had there was this.  He raved about how tasty it was so I knew I had to give it a whirl.  Simply for the fact, if he is raving about something I know I WILL FOR SURE like it! Oh yeah, and you make everything in one pan - what could be easier for clean up?!?!

I will say, I am sorry there are no pics, there were no leftovers (that's how good it was) and I forgot to take a picture when it was ready.  I will for sure next time though!

One Pan Balsamic Chicken

Ingredients

3/4cp. Italian Salad Dressing
4 tbsp. Balsamic Vinegar
3 tbsp. Honey
1 1/2 lbs. Boneless, Skinless Chicken Breasts, cut into 1in. cubes (or you could uses the chicken breast tenderloins)
2 tbsp. Olive Oil
1/2 tsp. Sea Salt
Fresh Ground Black Pepper to taste
1 1/2 lb. Green Beans (trimmed of tough ends and cut into 2in. pieces)
12oz. Mushrooms, sliced
1 1/4 cp. Grape Tomatoes, cut in half

Directions

-  Mix together the dressing, balsamic vinegar and honey in a measuring cup and set aside.

-  Heat 1 tbsp. of the olive olive and saute the mushrooms for 4 minutes until they have started to brown, then add the green beans and cook for abou 8 minutes until they are tender crisp.*

- Remove the vegetables from the pan; add the remaining oil and the chicken breast pieces.  Sprinkle with salt and pepper and saute until brown on each side.

-  Remove cooked chicken from the pan.  Add in the dressing mixture and cook on medium heat for a couple minutes while stirring constantly until it thickens and reaches a glaze consistency.

-  Add the chicken and veggies back into the pan and add the tomatoes.  Stir to coat everything and heat until heated through.  I cooked it long enough so the tomatoes started to pop, which added a great flavor to the dish.

*I did not cover the pan while the green beans were cooking and it seemed to take longer than 8 minutes to cook the green beans.   Next time I make this I will cover the pan to allow the beans to steam a bit.

Thanks for stopping by!  Hope you enjoy!  Feel free to leave feedback after you try this!

~Sarah Strubhar
Independent Team Beachbody 
Emerald Coach

Friday, November 13, 2015

Crock Pot Beef & Broccoli

I have been using our crockpot a ton lately.  Saw this recipe and wanted to try it.  We have never been huge fans of things made with soy sauce but have been up for trying new things lately.  I couldn't believe how tasty this was, not to mention EASY!!!

Score when the family approves and kept asking for more!

ENJOY!!

Beef & Broccoli

Ingredients:
2 lb Flank Steak cut into strips, width-wise (this makes for easier shredding at the end!)
2 cups Fresh Broccoli, chopped
4 Scallions, sliced length-wise (optional)
1/2 C low sodium Beef Broth
2 Tbsp. Liquid Aminos
Garlic Powder
1 tsp. Ground Ginger
1 tsp. Onion Powder

Directions:
-  Spray crock pot with non-stick Olive oil spray.
-  Place flank steak in crock pot.
-  If using green onions, sprinkle on top of steak. 
-  Mix together beef broth, liquid aminos, garlic, and spices, and pour over meat.
-  Cook on low 6 1/2 hours. 
-  Shred beef using 2 forks and add broccoli**. 
-  Cook an additional 30 minutes, or until broccoli reaches desired tenderness.

** I actually roasted our broccoli in the oven with some red peppers and served that along side the beef with some brown rice.

Monday, November 9, 2015

Slow Cooker Granola

Slow cookers aren't just for dinner and I am learning that more and more everyday!

Do you love granola! I DO!!!!!  BUT, I have always been too nervous to make it on my own!  I always thought you needed all these expensive ingredients to make it; or it would take too long; or I would burn it in the oven and there would be perfectly fine granola wasted.

BUT, not anymore!  I saw this recipe in a group I was in recently and knew I HAD to try it.  Seriously it couldn't have been any easier and tasty, well that's just not the word for it!  Thank goodness I have it in my head to only eat what it is per day to fit in my meal plan!  Because honestly, it wouldn't be lasting very long otherwise!!!

Here you go!  Try it out sometime!!

Slow Cooker Granola

Ingredients:

2 1/2 cps. Old Fashioned Rolled Oats (organic or gluten free if preferred)
1/4 cp. Nuts, chopped (almonds, walnuts, etc. - I used 1/8 cp. walnuts & 1/8 cp. almonds)
1/8 tsp. Sea Salt
1/3 cp. Pure Honey - organic if possible
3 tbsp. Extra Virgin Coconut Oil
1/4 cp. Peanut Butter (plain or chunky - your preference; organic if possible but not necessary)
1 1/2 tsp. Cinnamon (could use a bit less if you don't like the taste of cinnamon)
1 3/4 tsp. Vanilla (could use a bit less if you don't like the taste of vanilla)
1/4 cp. dried Fruit (raisins, cranberries, etc. I used 1/8 cp. of both)

Directions:
-  Coat the inside of your slow cooker with cooking spray (I use olive oil spray). 
-  Pour in oats, nuts and salt into slow cooker.
-  In a glass bowl, combine the honey, coconut oil, and peanut butter. Microwave for about 30 seconds until melted and you can combine smoothly. You may need to microwave more depending on your microwave. 
-  Stir cinnamon and vanilla into melted mixture.
-  Pour mixture over the oats in the slow cooker. Mix well so everything the oats are thoroughly mixed and coated. 
-  Place lid on slow cooker, but keep it slightly vented. I put my lid on just slightly sideways so it wasn’t on tight. 
-  Cook on high for about 1.5 – 2 hours, stirring every 15 minutes. It is important to stir it because it can burn a little if you don’t. The oats will be ready when they are moist but not wet.
-  Stir in dried fruit at the end. 


-  Spread granola out on a parchment lined baking sheet. Let the granola cool completely. The granola with actually harden a bit at this point and become that familiar granola texture.
-  Once cool, store in airtight container.
*There are so many possibilities you could mix in with this - sunflower seeds, dried apricots, apples, carob chips, etc.  You name it you could do it.  If you try this and try different mix-ins, let me know!  I would love to hear your feedback!

Thanks for stopping by and checking this out!  Have a great day!

~Sarah Strubhar
Independent Team Beachbody Ruby Coach


Wednesday, October 28, 2015

Chocolate Truffles!

I LOVE chocolate!  What about you?

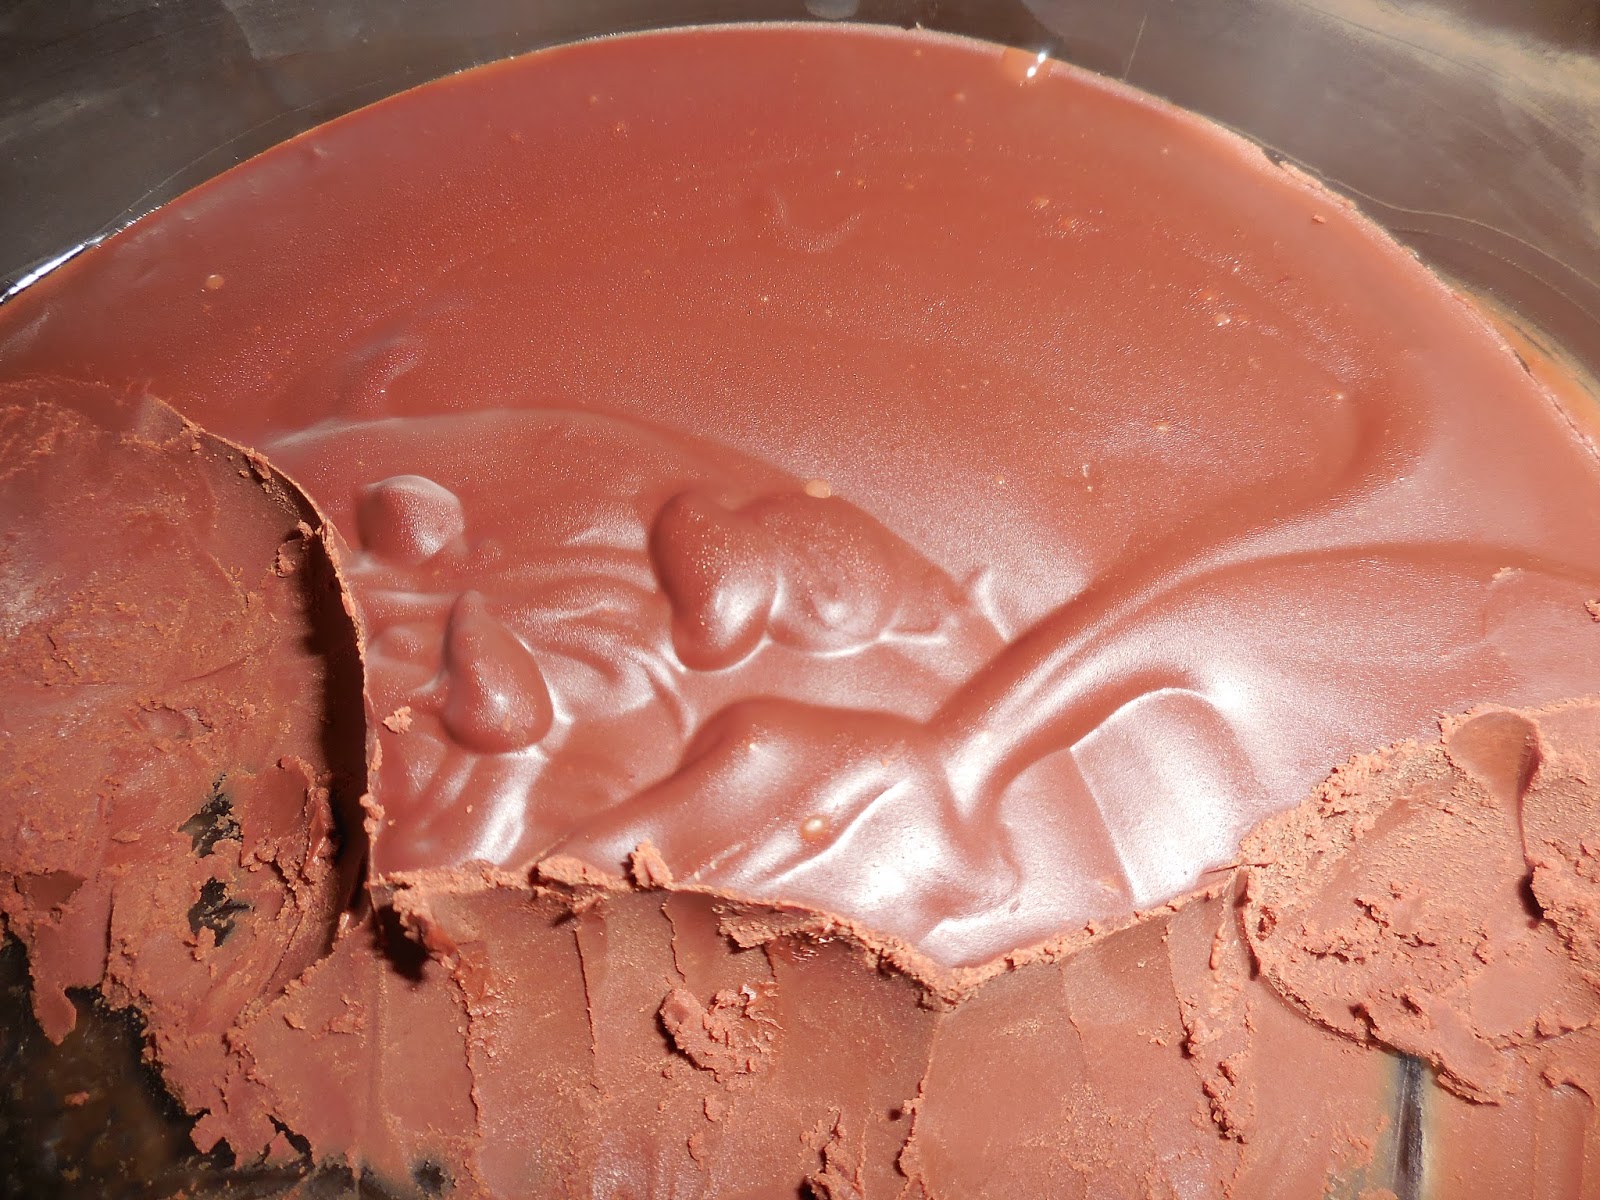
What about chocolate candy or better yet TRUFFLES?!?!?  Found this recipe on Team Beachbody's website a while back and made them for one of my book club gatherings.  SCORE!!!! They were SOOO tasty and healthy and called for only a few ingredients.  Since making them the first time, I have made them again and change up the flavors.  I can't wait to continue making these again and trying different flavor combinations!

Chocolate Truffles

Ingredients:


5oz. Dark Chocolate (70% cocoa or higher), - I used Guittard 70% cocao chocolate the first time and Ghiradelli 70% cocoa chocolate, in my opinion, the Guittard was better
1 tbsp. Extra Virgin Coconut Oil, melted
1/2 cp. canned lite Coconut Milk
1/2 tsp. Extract (I have used Pure Mint & Caramel extract so far)
1/3 cp. unsweetened cocoa (optional)


Directions:
- Finely chop the chocolate and place in a small bowl.

-   Pour the melted coconut oil & extract in the small bowl with the chopped chocolate and stir together mixing well.  Set aside.

-  Bring the coconut milk to a gentle boil in a small saucepan over medium heat.

-  Add the heated coconut milk to the chocolate mixture and whisk gently to blend.


-  Cover the chocolate mixture and place in the refrigerator for a minimum of 4 hours or over night at least.

-  Using a mellon baller or spoon, scoop 1 tbsp. of chocolate mixture and roll into a ball.  Roll the ball into the cocoa powder until evenly coated if desired.  Repeat to make 12 truffles.

-  Store in the refrigerator for up to one week or the freezer for up to 3 months.

Just some of my notes:
- When I made the mint truffles, I dusted them in the cocoa powder.
- When I used the caramel extract, I added a twist of the sea salt shaker and didn't dust them with cocoa powder.
-  The possibilities are endless here.  I also thought of using cherry juice for a black forest twist, raspberry juice or almond extract.  You could also just make plain chocolate truffles and coat them in walnuts, peanuts, pistachios, pecans or whatever you like.

These are fantastic for a sweet treat to share at a party or as a gift.   Enjoy and let your imagination drive what flavor combinations you want to try next!

For those following the 21 Day Fix plan, 1 truffle equals 1 yellow container.

Thanks for stopping by!

~Sarah Strubhar
Independent Team Beachbody Ruby Coach

Chicken Noodle Soup - 21 Day Fix Style

We have been fighting colds this week and what better thing to battle a cold with than some homemade chicken noodle soup.  BONUS when it comes from a cookbook that helps with portions and keeps me on track for my nutrition.  I took the recipe from the recipe book and made a few slight changes.

Hope it warms you on a cool day or if you aren't feeling well!

Chicken Noodle Soup

Ingredients:

2 tsp. Olive Oil (or coconut oil)
1/2 cp. Onion, chopped
1 1/2 - 2cps. Celery, chopped (about 4-5 medium stalks)*
4 cps. Low Sodium Chicken Broth
3 cps. Rotissseri Chicken Breast (boneless & skinless), chopped**
1 1/2 - 2cps. Carrots, chopped *
1 tsp. dried Oregano
Sea Salt & Black Pepper to taste
1 1/4 dry Whole Grain (or wheat) Pasta - Penne, Rigatoni, bows, shells, etc.)***
Fresh Parlsey and/or Cilantro for garnishing (if desired)

Directions:
-  Heat oil in a large saucepan over medium heat.

- Add onions, celery & carrots cooking and stirring frequently for 3-5 minutes until the onions are translucent.

-  Add the broth, chopped chicken, carrots, oregano, salt & pepper.  Bring to a boil.  Add pasta & reduce heat to low and cook pasta for about 10 minutes until cooked through.

-  Top with cilantro and/or parsley before serving if desired.

My Changes:

*  Recently when I made this, I didn't have enough celery so instead of using the 2cps. of celery and 1 1/2cps. of carrots it calls for, I switched and used 1 1/2cps. celery and 2cps. of carrots. 
**I actually just cook 2 medium boneless, skinless chicken breasts and then chop them and use instead of a rotisserie chicken.
***You could also use a gluten free pasta, brown rice pasta or quinoa pasta for a gluten free spin.
****I also like to add in additional veggies when I make noodle soup, so I always add in frozen green beans and frozen peas at a minimum when I make chicken noodle soup.  I probably add about 1 to 1 1/2cps. of green beans and 3/4cp. of peas.  But, you could either add any other veggies of your choice or omit this if you didn't want to add them in.
*****You could also add in some dried thyme or and rosemary if you like.  When I cooked my chicken, I sprinkled thyme, parsley, rosemary on the chicken prior to cooking.

21 Day Fix Equivalents:  When made per the recipe above (without my changes), 1 serving equals 1 1/2cps. each for a total of 4 servings.  The container breakdown is 2 green, 1 1/2 yellow and 1 red.  However, if you throw in some extra veggies, the container breakdown would then be more like 2 1/2 green, 1 1/2 yellow & 1 red.

Thanks for stopping by!  Hope you enjoy and it warms your soul.

~Sarah Strubhar
Independent Team Beachbody Ruby Coach

Tuesday, October 27, 2015

Apple Picking and Apple Crisp!

Every fall I love to go apple picking with our family!  Last year we didn't go, so there was no way we were missing that this year.  However, there are so many different varieties of apples to choose from and I can honestly say we don't usually pick the same variety every year.

So, after picking nearly 20lbs. of apples, now the question comes, what are we going to do with those apples?  In the past I would make apple sauce full of sugar, apple butter, apple crisp, apple cake, apple dumplings, apple pie filling and whatever else I could come up with.  However, each one of these recipes that I had made in the past don't really align with the clean eating journey now.

BUT, problem solved when I found this recipe on Beachbody's website (but I have tweaked it a bit for our liking).  I have enjoyed it so much I have made it multiple times!  LOVE the fact that it only has a handful of ingredients!  This is fantastic on it's own.  PLUS I warmed a serving in the microwave this afternoon and poured it over some Greek yogurt this afternoon which was phenomenal!

Give it a try and let me know what you think!

Apple Crisp
*taken from teambeachbody.com

Ingredients:
4 cups peeled, sliced apples
5 Tbsp. pure maple syrup, divided use (original recipe calls for 3tbsp.)2 tsp. ground cinnamon, divided use (original recipe calls for 1tsp.)½ cup old-fashioned rolled oats¼ cup finely chopped raw walnuts

Directions:
1. Preheat oven to 375° F.
2. Combine apples, 3 Tbsp. maple syrup, and 1 tsp. cinnamon in a medium baking dish; mix well. Set aside.
3. Combine oats, walnuts, remaining 2 Tbsp. maple syrup, and remaining 1 tsp.cinnamon in a medium bowl; mix well.
4. Top apple mixture with oat mixture. Bake for 25 to 30 minutes or until apples are soft.

NOTE:  For my 21 Day Fix Lovers, 1 Serving equals 1 purple and 1/2 yellow and 1/2 blue or orange container.  This recipe serves 4.


Thanks for stopping by!  Enjoy!!
~Sarah Strubhar
Independent Team Beachbody Ruby Coach

Wednesday, October 7, 2015

Peach Rosemary Chicken Bake

I recently had a friend inquire about clean eating and if it is doable when eating gluten & dairy free.  My answer, was definitely.  So, I went on the hunt for some recipes.  This was one I found.  I changed it a little bit from the original as the original called for chicken thighs & I used boneless, skinless chicken breasts and used a different oil compared to the origianl recipe.  I also thought of cooking this in the crockpot but wanted to try it first with the way the original recipe indicated.  So, next time I make it, I will for sure do this in the crockpot.  Give it a spin and let me know what you think!

Peach Rosemary Chicken Bake

Ingredients:

2 T. Safflower Oil
1 Small Sweet Onion, sliced thinly
 4 Sprigs Fresh Rosemary, stems removed, chopped
1 ½ t. Sea Salt
¼ t. Pepper
3 Peaches, pitted, sliced
1/3 cp. Honey (if your peaches are really ripe, use 1/4 cp.  If your peaches are not very ripe use between 1/3 & 1/2 cup.)
¾ cp. Balsamic Vinegar
2 Large boneless, skinless Chicken Breasts

Directions:

- Preheat the oven to 375 degrees.

 In a large sauté pan, heat the safflower oil to medium/high. Add the onion, rosemary, salt and pepper, sautéing until the onion is translucent and soft, about 4-5 minutes. Add the peach slices to the pan and sauté with the onion for another 5 minutes. Add the honey and balsamic vinegar to the pan and bring to a simmer. Simmer for about 5 minutes, or until the sauce has reduced to a thick syrup. Do not reduce too long or the syrup will caramelize

- Place the chicken breasts in a lightly greased baking dish. Pour the peach/balsamic sauce over the chicken, spreading the peaches over the chicken evenly.

- Bake in preheated oven for 1 ½ hours, or until tender and cooked through.

-  Remove from oven and pour the liquid in the baking dish into a small saucepan.

-  Bring the liquid to a boil over high heat and let it boil down to a thick sauce, about 2-3 minutes.

-  Pour the sauce back over the chicken, evenly coating.

-  Serve & Enjoy.

*I served this with a sweet potato and a green bean, mushroom saute.  For the green bean recipe, click HERE.  


Saturday, September 19, 2015

Snow Peas & Red Pepper Saute - 21 Day Fix Approved

I know Snow Peas are not in season right now, but I was at the store the other day trying to think what vegetable to try next.  Snow Peas caught my eye so I picked some up.  BUT once I got home, I thought now how to prepare them other than just steaming them with some lemon juice maybe.  So I saw a recipe similar to this one but didn't have all the ingredients to use that exact one (surprise, surprise!).  Instead I decided to use what I had on hand and come up with my own combination.  Here you go!  Even with my own spin, this was one of the EASIEST and tastiest veggie side dishes I have made in a while!

Snow Peas & Red Pepper Saute

*with parmesan cheese
Ingredients:
1 lb. Fresh Snow Peas, trimmed
1 1/2 lg. Red Peppers, roughly chopped
2-3 tsp. Coconut Oil
Sea Salt
Black Pepper
Parmesan Cheese (optional)

Directions:
-  Heat the coconut oil in a large saute pan over medium/medium-high heat.
-  Add the trimmed peas and roughly chopped peppers to the pan.  Saute for about 5 minutes or until the peas and peppers are tender crisp.
-  Add salt and pepper to taste and sprinkle with parmesan cheese.  Stir to combine.
-  SERVE & ENJOY!!!!
*without parmesan cheese

* When I made this I measured the peas and peppers into my green containers and for myself I used 1 1/2 green containers of peas and 1/2 container of red pepper.  So totaled 2 green, 1 spoons.
*  For my husband, I used 2 1/2 greens of peas & 1 full green for red peppers to total 3 1/2 green containers & 2 spoons.

Thanks for stopping by!  Check back again for more recipes to come!

ENJOY!


~Sarah Strubhar
Independent Team Beachbody Emerald Coach

Tuesday, September 15, 2015

Peach & Jalepeno Salsa

Peach season is winding down to an end here in the northeast, but I wanted to share a recipe that I found on Team Beachbody's website this summer.  It is a great one if you are looking for a way to use up any peaches and want to try something that you otherwise might not have done.  It is FANTASTIC with chicken, pork chops, a hearty white fish (cod, halibut, etc.) or just a dipping salsa as well (I have used it with all of the above!)  Hope you give it a try sometime soon!

Peach and Jalepeno Salsa

Ingredients:
2 medium Peaches, peeled & chopped
1/4 medium Red Onion, chopped
1 medium Jalepeno pepper, seeds & veins removed & chopped
1/8-1/4 tsp. Crushed Red Pepper Flakes
2 Tbsp. Fresh Lime Juice
1/4-1/2 tsp. Hot Sauce (I used Texas Pete's Original)
1-2 tbsp. Fresh Cilantro, finely chopped (this may vary depending on your preference)

Directions:
In a medium bowl combine all the above ingredients mix well and set aside! (Seriously it is that easy!)

Top the protein of your choice or use it as a side for chips and salsa.

Hope you enjoy!!

Have a great day and check back again for more recipes!

Thank you!
~Sarah Strubhar
Independent Team Beachbody Emerald Coach

Tuesday, September 1, 2015

Pork Carnitas - Slow Cooker Style (21 Day Fix Approved)

I LOVE finding new recipes and I LOVE finding new twists on mexican style food.  Recently I have been trying to clean out our freezer, so I have been trying to come up with different things to make so we aren't eating the same thing over and over again.  One day I was trying to think of something to do with a pork roast I had instead of the usual pulled pork sandwich or traditional pork roast and I came across this recipe.  I figured, WHY NOT!  It was tasty and easy and not to mention, didn't call for anything out of the ordinary.  Definitely a bonus when I find a recipe to try and I have all the ingredients already.

Hope you give it a try and enjoy it!

Pork Carnitas - Slow Cooker Style

Ingredients:
4 lb. Boneless Pork Loin or Roast
1 tbsp. Chili Powder
1 tbsp. Ground Cumin
1 tbsp. Oregano
1 tsp. Sea Salt
1 tsp. Black Pepper
1 tsp. Garlic Powder
2 Onions, sliced
2 Oranges (medium)
1-2 Limes (depending on size and how much you prefer the lime flavor)
Corn Tortillas OR Whole Grain Tortillas

Directions:

1.  Spray your slow cooker with olive oil cooking spray.

2.  Place the pork roast in the crockpot.

3.  Layer the oninos on the roast.

4.  Squeeze the juice from the oranges and limes over the meat and onions.  Then put the entire fruit into the crockpot.

5.  Cover and cook on low for 6-8 hours.

6.  Once cooked, remove the pork roast from the crockpot and shred.  Save the juices in the crockpot but discard the oranges and lime(s).

7.  Return the shredded pork to the crockpot and rest it in the saved juices for 15-30 minutes.

8.  In the meantime, preheat your oven broiler.  Take the pork out of the crockpot with a slotted spoon and spread evenly on a rimmed baking sheet.

9.  Broil the meat until the edges of the meat start to look crispy - about 5 minutes.

10.  Serve inside the tortillas with desired tacos fixings (i.e. romaine lettuce, black beans, cheese, tomatoes, avocado, sour cream OR greek yogurt).

21 Day Fix Container Counts for 1 serving:

1-Red (pork)
1-Green (veggies on top)
1-Yellow (2 corn tortillas)
1-Blue (cheese and or veggies)

Thanks for stopping by!  Hope you come back soon!

~Sarah Strubhar
Independent Team Beachbody Emerald Coach

Monday, August 31, 2015

Buffalo Cauliflower Bites

I saw a recipe recently for some spicy cauliflower bites and when I went to make them I realized I didn't have all the ingredients in my pantry.  So instead I figured I would wing it and come up with my own spin on the recipe and use what I had in my pantry.  I don't know what the original recipe tastes like, but I know this one is MIGHTY tasty.

I took it to a friend's house this past weekend for dinner and it was GONE and gone QUICKLY!  Which is why I don't have a picture because I forgot to take one when they were done and there was nothing left to take a picture of at the end of dinner.

I hope you enjoy this as much as everyone that ate it there did!

Buffalo Cauliflower Bites

Ingredients:
1 head of Cauliflower
Olive Oil
Sea Salt
Black Pepper
Paprika
Cumin
Chili Powder
Hot Sauce (I used Frank's Red Hot Original)

Sauce Ingredients:
Greek Yogurt
Blue Cheese crumbled up (OR Hidden Valley Ranch Packet Seasoning Mix)

Directions:
-  Preheat the oven to 400 degrees
-  Clean and seperate the cauliflower into small floret pieces.
-  Spread the florets onto a rimmed baking sheet and sprinkle the olive oil over top.  Then sprinkle the sea salt, pepper, paprika, cumin & chili powder over to your liking.  Toss to make sure all the cauliflower pieces are coated well.
-  Bake in the oven for 20-30 minutes (until the florets are tender but crispy still).
-  Once the cauliflower is roasted, remove from the oven and pour into a serving bowl.  Then top with a few shakes of the hot sauce bottle to your liking (I probably used at least a 1/2 cp. if not more).

-  While the cauliflower is cooking, in a small bowl, mix about 1 cup or more of the greek yogurt with crumbled blue cheese to your liking.  (Depending on how much you like blue cheese will depend on how much you use.  If you don't like the taste of blue cheese, you could also use a Hidden Valley Ranch packet and mix up some ranch dip or use the fresh herbs of ranch and make that as well.)

I know I will be making this again sometime soon and when I do I will be sure to take a picture!

ENJOY!!!  Thanks for stopping by!  Come back again soon for more ideas!

~Sarah Strubhar
Independent Team Beachbody Emerald Coach